> ## Documentation Index
> Fetch the complete documentation index at: https://docs.seosorted.ai/llms.txt
> Use this file to discover all available pages before exploring further.
# WordPress
> Publish finished articles straight to your WordPress blog using an application password.
The WordPress connector posts articles to your site through the WordPress REST API, using an
**application password** — a revocable credential that is not your login password.
Works with self-hosted WordPress and WordPress.com Business (any install where the REST API is
reachable). Requires WordPress 5.6 or newer, which is when application passwords landed.
## Step 1 — Create an application password in WordPress
Sign in to your WordPress admin and go to **Users → Profile**, then scroll to **Application
Passwords**.
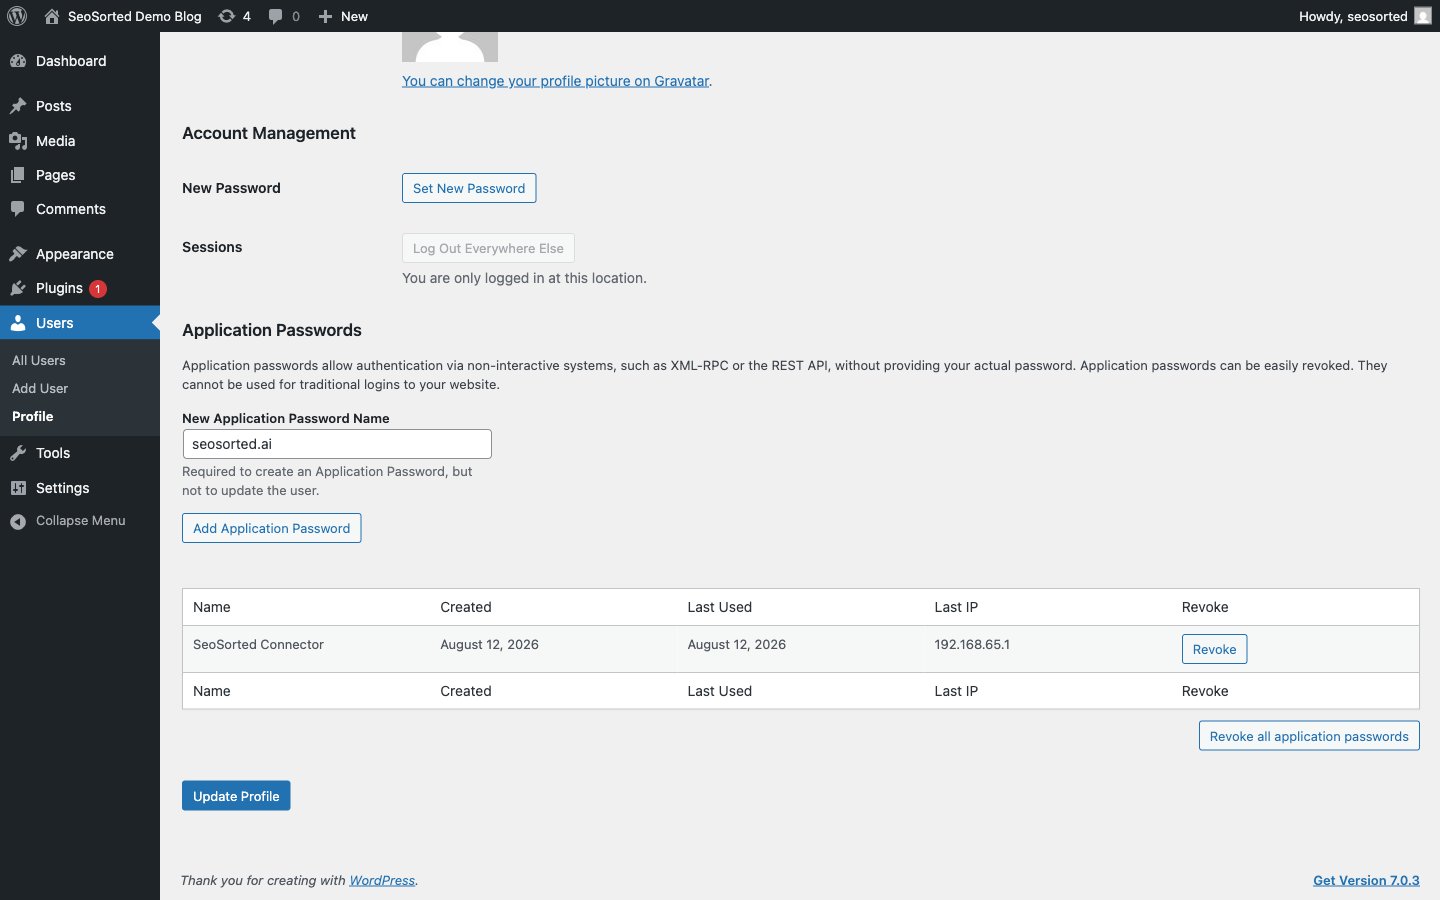 Type a name you will recognise later — `seosorted.ai` works well — and click **Add Application
Password**.
Type a name you will recognise later — `seosorted.ai` works well — and click **Add Application
Password**.
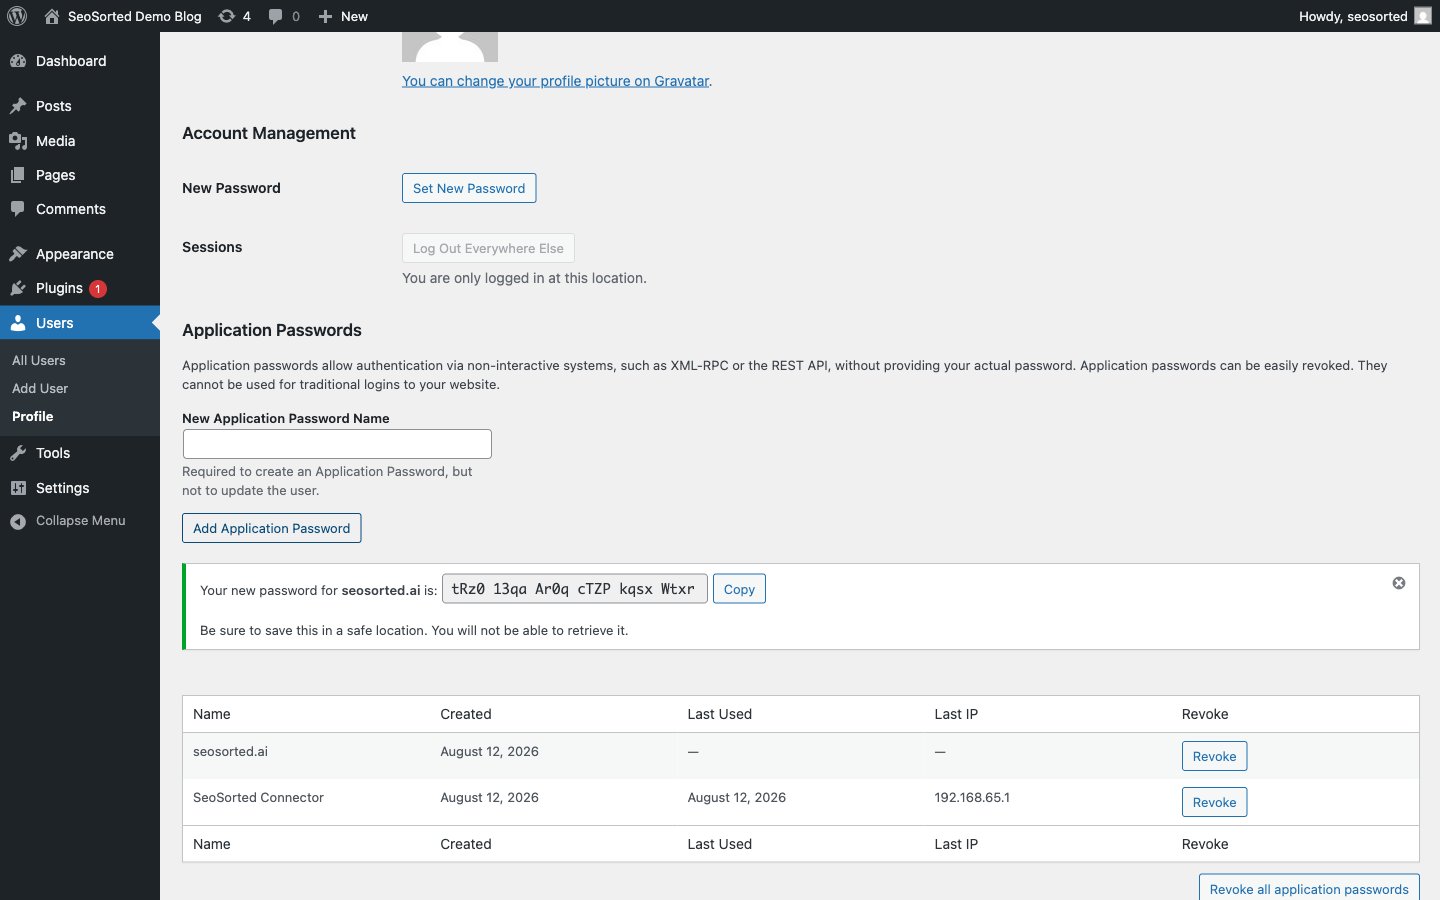 WordPress shows the password exactly once. Copy it before leaving the page. If you lose it,
delete the entry and generate a new one — nothing else breaks.
The password appears in spaced groups (`tRz0 13qa Ar0q cTZP kqsx Wtxr`). Paste it exactly as
shown; the spaces are handled for you.
WordPress hides it when the site is not served over HTTPS, because the credential travels as a
basic-auth header. Serve the site over HTTPS, or — for a local development site only — set
`WP_ENVIRONMENT_TYPE` to `local` in `wp-config.php`.
Some security plugins (Wordfence, iThemes Security, SolidWP) also disable application passwords
or the REST API outright. Look for a "REST API" or "Application Passwords" toggle in the plugin's
settings.
## Step 2 — Connect from SeoSorted
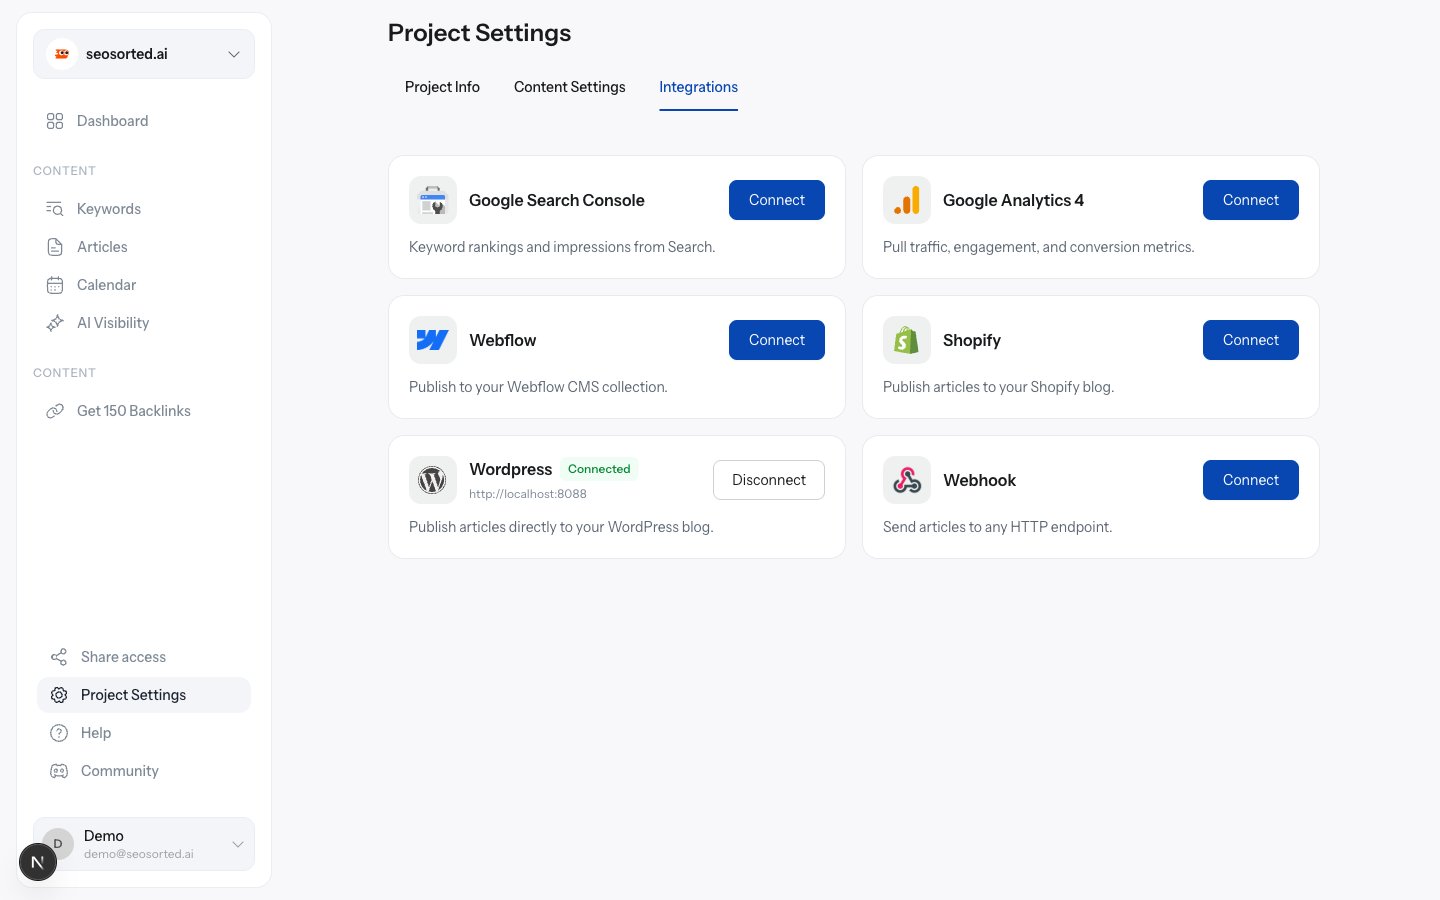
Go to **Project Settings → Integrations** and click **Connect** on the WordPress card.
WordPress shows the password exactly once. Copy it before leaving the page. If you lose it,
delete the entry and generate a new one — nothing else breaks.
The password appears in spaced groups (`tRz0 13qa Ar0q cTZP kqsx Wtxr`). Paste it exactly as
shown; the spaces are handled for you.
WordPress hides it when the site is not served over HTTPS, because the credential travels as a
basic-auth header. Serve the site over HTTPS, or — for a local development site only — set
`WP_ENVIRONMENT_TYPE` to `local` in `wp-config.php`.
Some security plugins (Wordfence, iThemes Security, SolidWP) also disable application passwords
or the REST API outright. Look for a "REST API" or "Application Passwords" toggle in the plugin's
settings.
## Step 2 — Connect from SeoSorted
Go to **Project Settings → Integrations** and click **Connect** on the WordPress card.
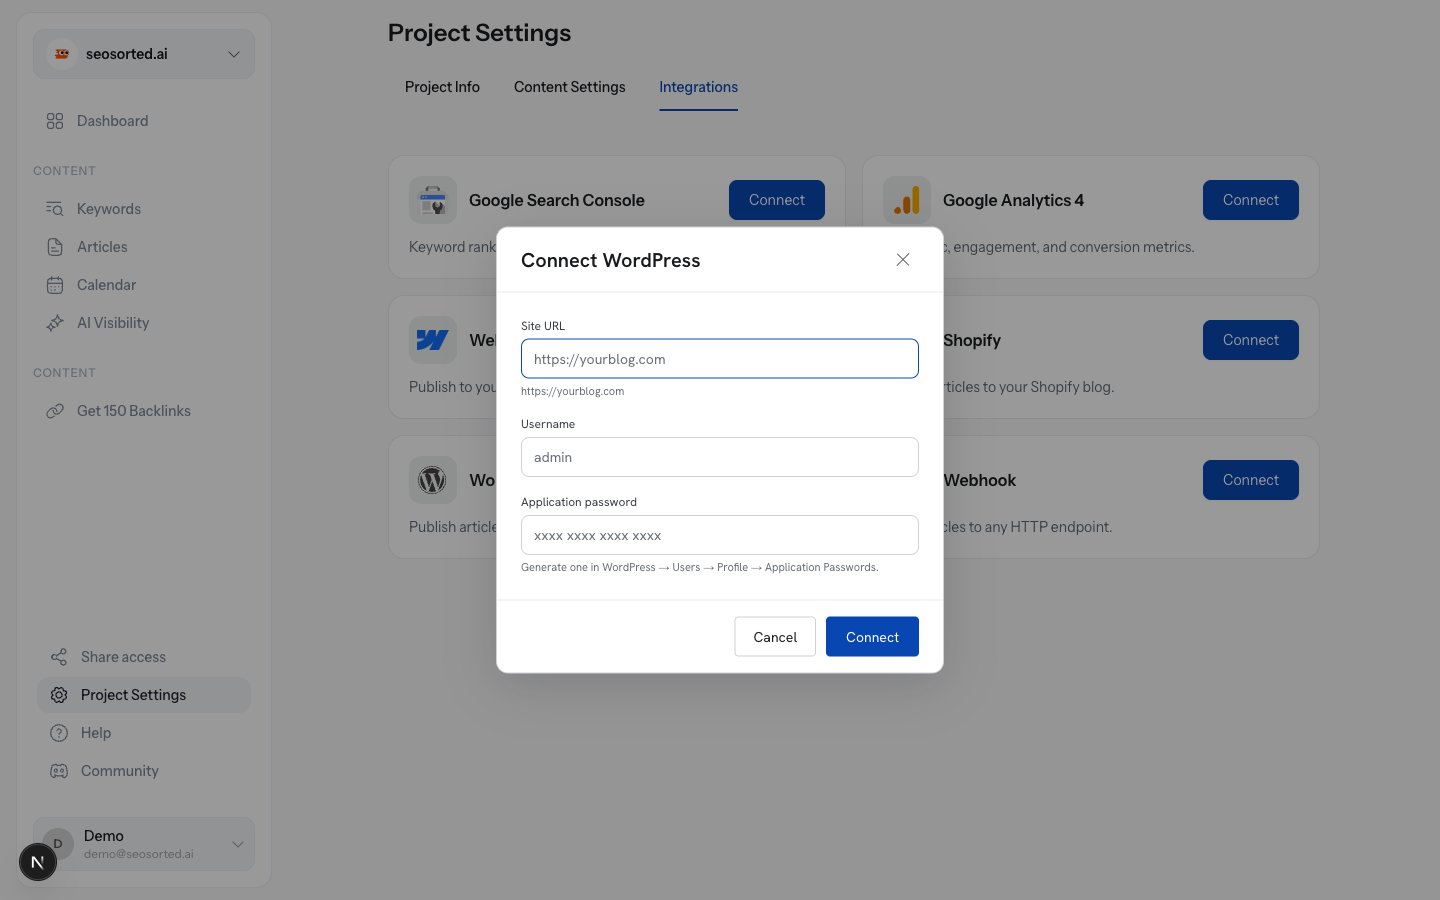 Fill in three fields:
Your site's home URL, for example `https://seosorted.ai`. Pasting the admin URL
(`https://seosorted.ai/wp-admin/`) is fine — the `/wp-admin` part is trimmed automatically.
The WordPress username the application password belongs to — the login name, not the display
name and not the email address.
The value from Step 1. Spaces are fine.
Fill in three fields:
Your site's home URL, for example `https://seosorted.ai`. Pasting the admin URL
(`https://seosorted.ai/wp-admin/`) is fine — the `/wp-admin` part is trimmed automatically.
The WordPress username the application password belongs to — the login name, not the display
name and not the email address.
The value from Step 1. Spaces are fine.
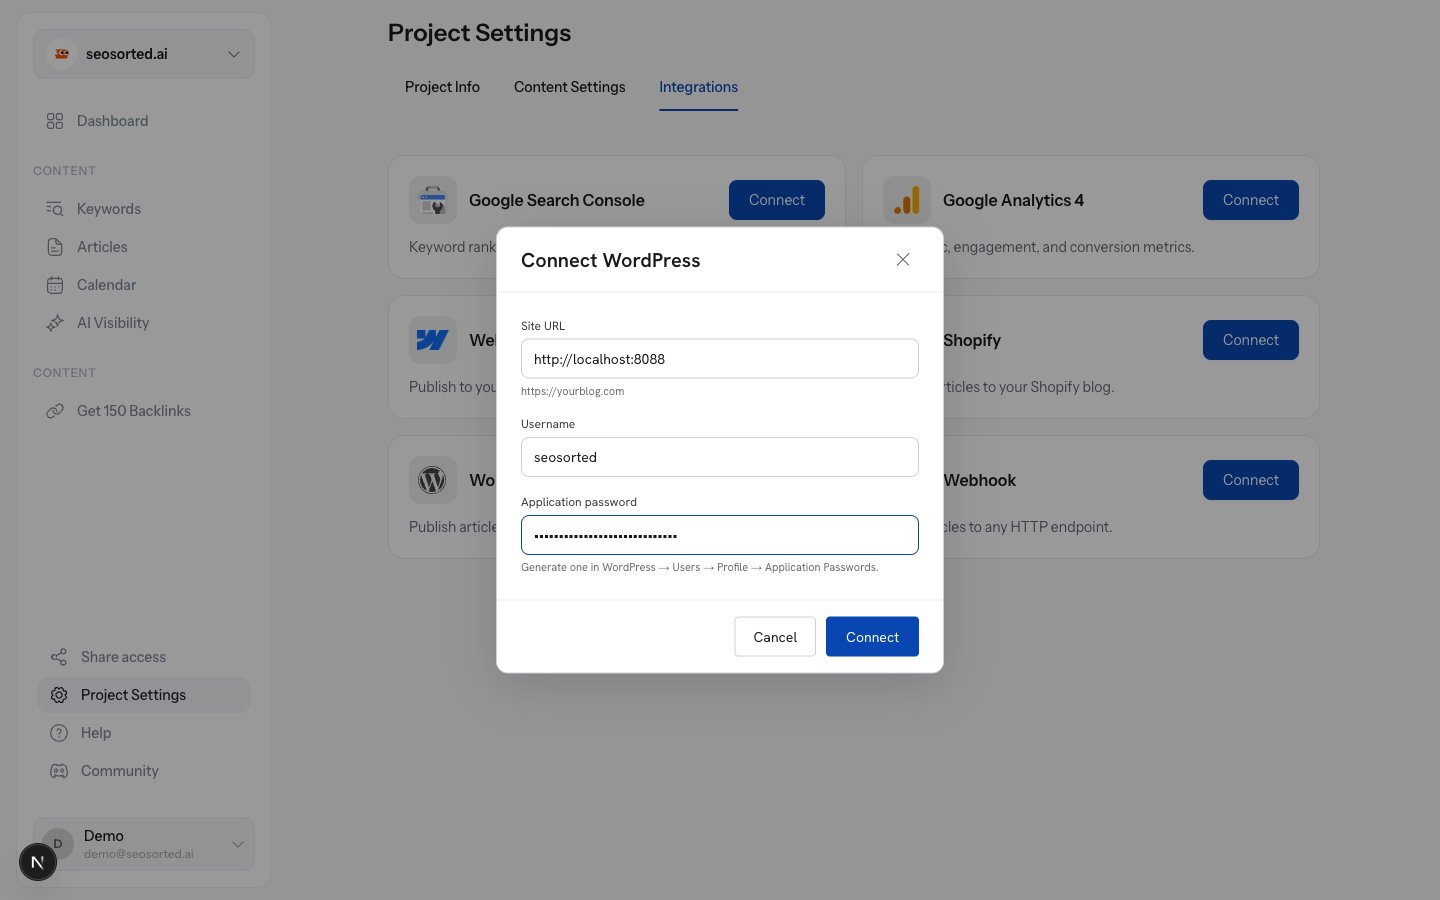 Click **Connect**. We call your site once to confirm the credentials work before saving anything,
so a green **Connected** badge means the connection is genuinely live.
Click **Connect**. We call your site once to confirm the credentials work before saving anything,
so a green **Connected** badge means the connection is genuinely live.
 ## Step 3 — Publish an article
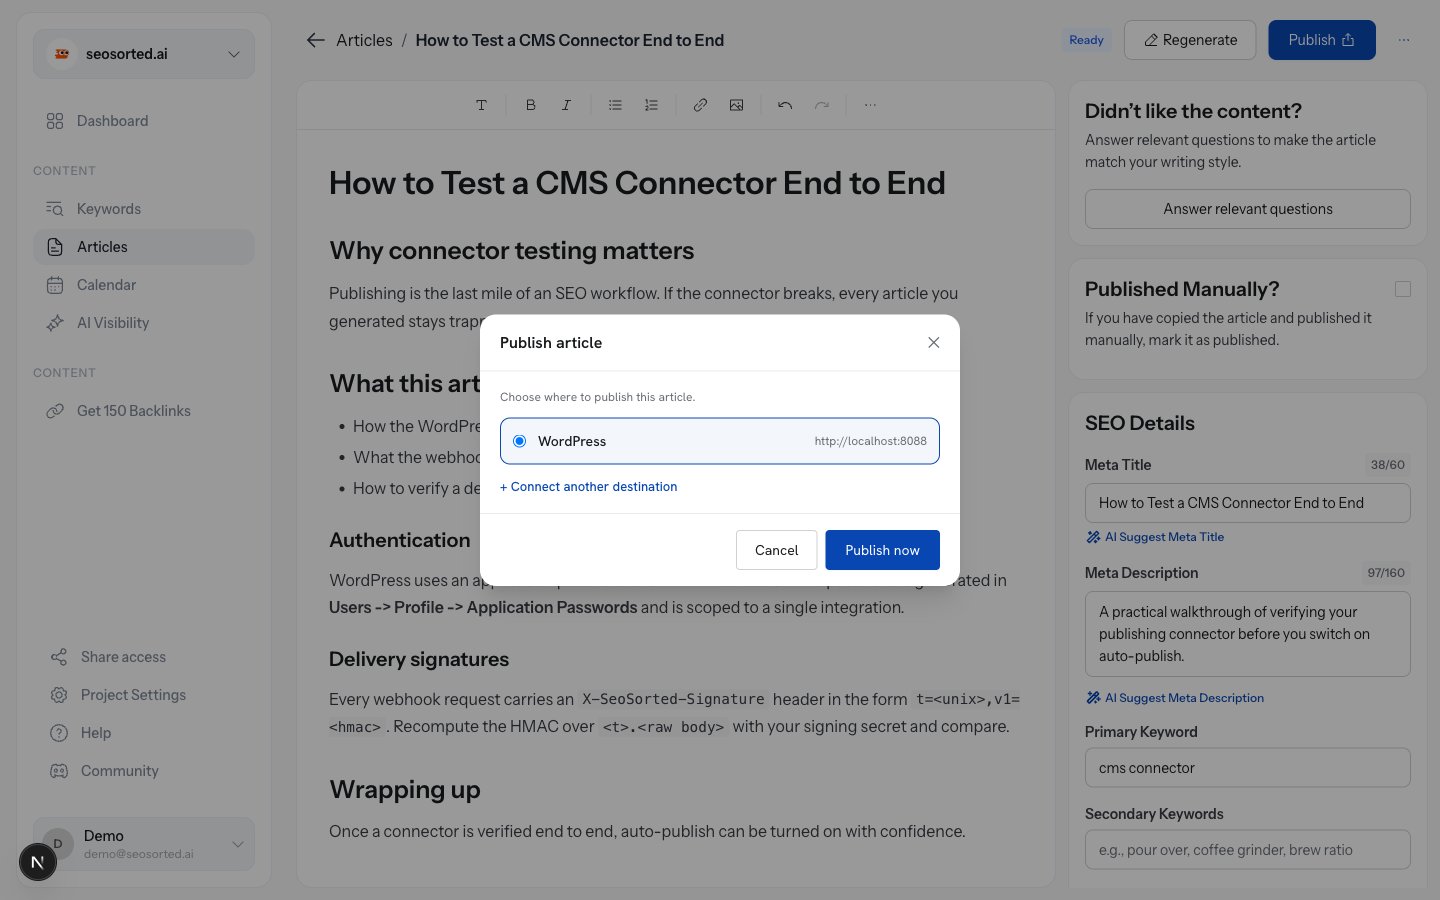
Open any finished article and click **Publish** in the top right, pick **WordPress**, then
**Publish now**.
## Step 3 — Publish an article
Open any finished article and click **Publish** in the top right, pick **WordPress**, then
**Publish now**.
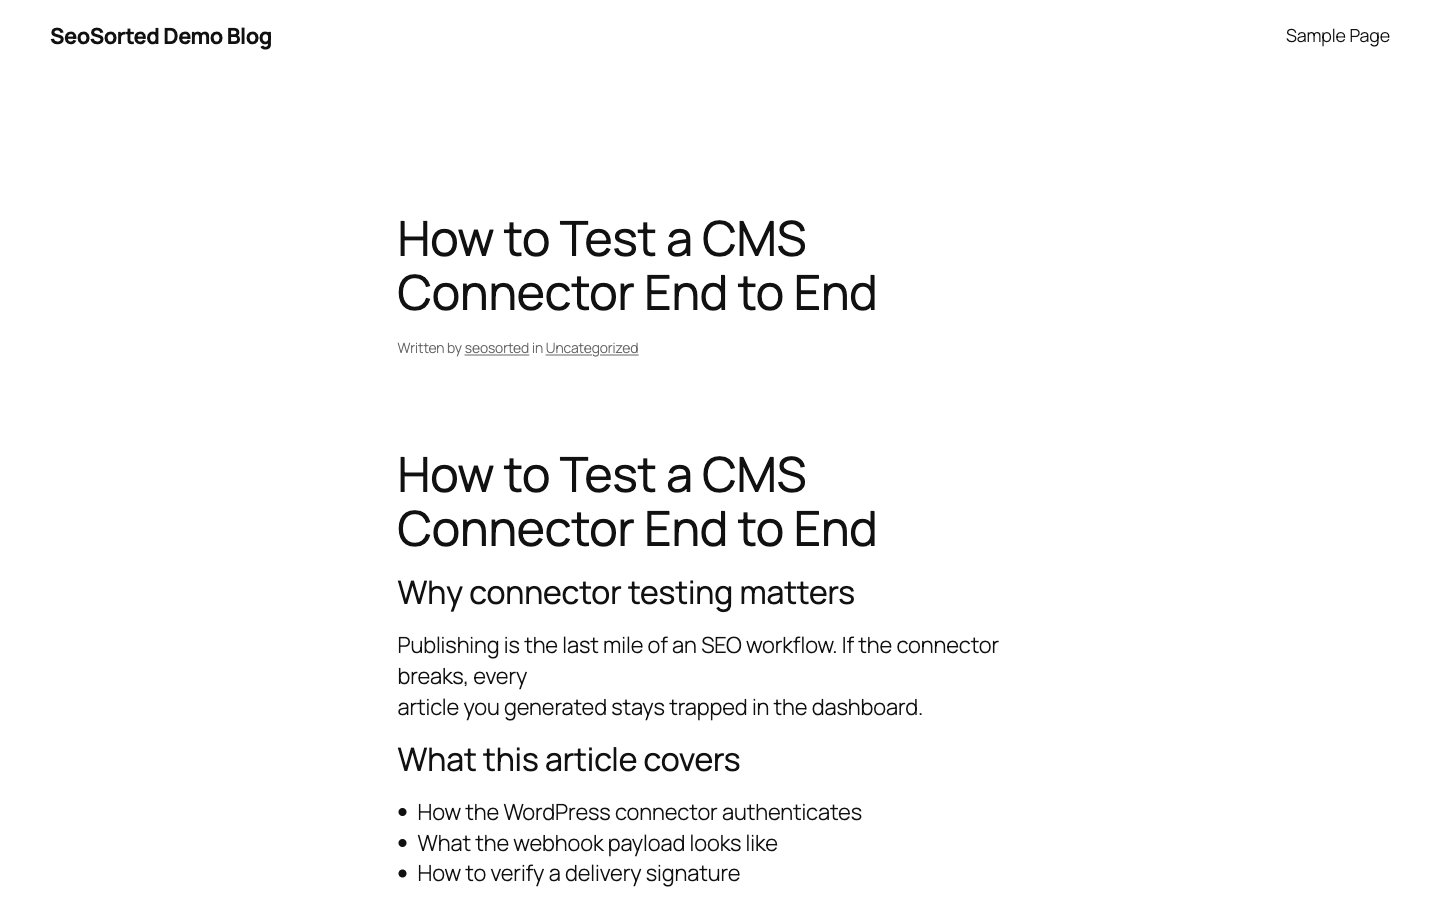
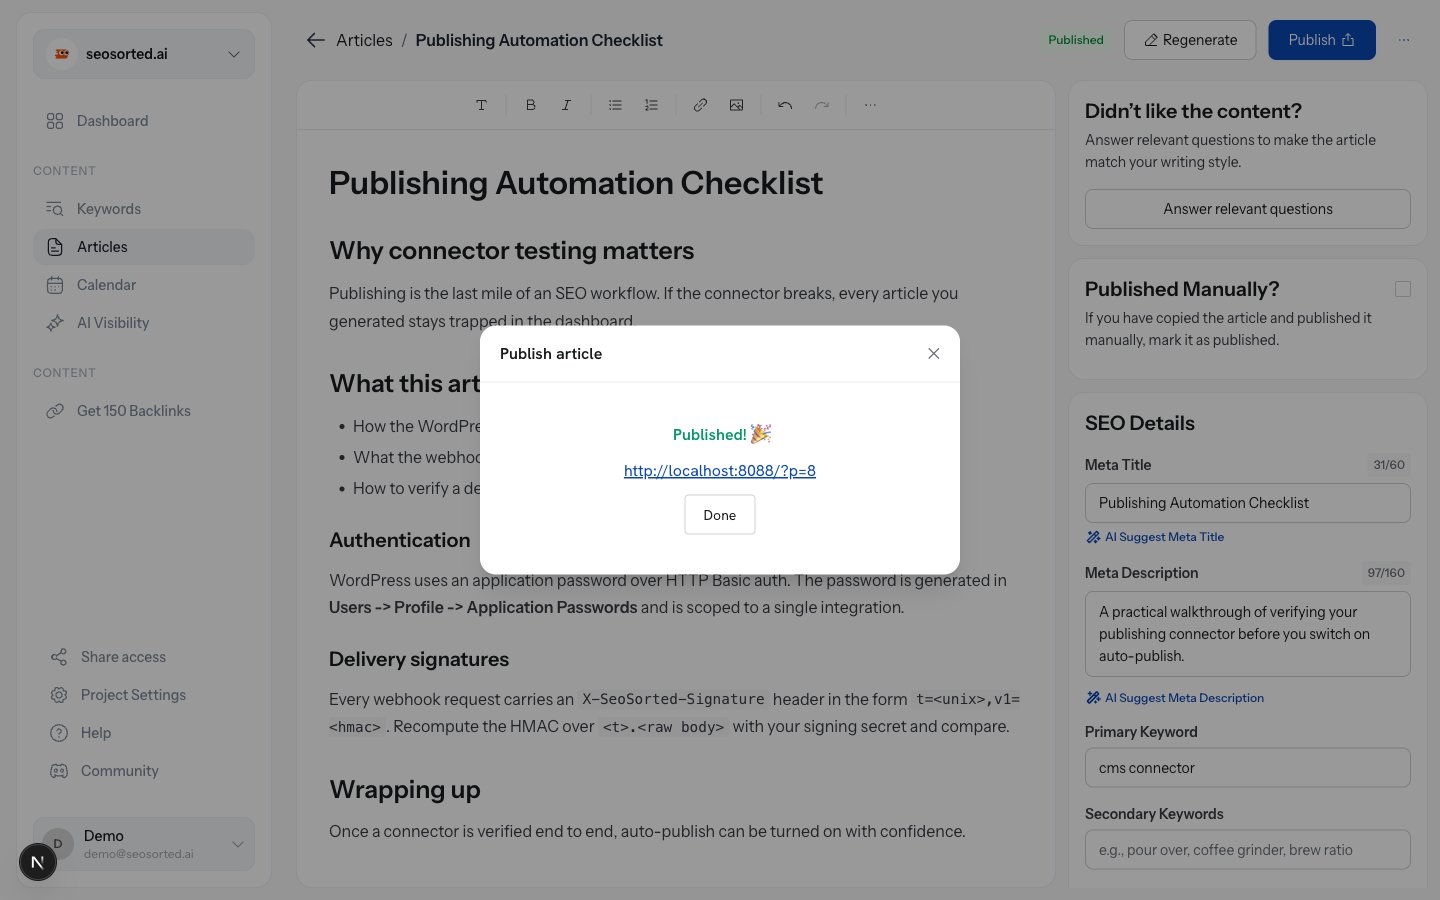 The article opens on your site as a published post.
 ## What gets sent
| Article field | Lands in WordPress as |
| ---------------- | ----------------------------------------------------------- |
| Title | Post title |
| Body | Post content (HTML), with JSON-LD article schema prepended |
| Slug | Post slug |
| Meta description | Post excerpt |
| Featured image | Uploaded to the Media Library and set as the featured image |
Posts are created with status **publish**, author = the connected user, and no category, so they
land in your default category.
Re-publishing the same article creates a **new** post rather than updating the existing one.
Edit in WordPress after the first publish, or use the [webhook connector](/connectors/webhook)
if you need update semantics.
## Common problems
The username or application password is wrong. Check you used the *username*, not the email,
and generate a fresh application password — a copied password with a missing character fails
silently in most password managers.
We tried both `/wp-json/` and `?rest_route=` and neither returned JSON. Usually one of:
* a security plugin blocking the REST API,
* the site sitting behind HTTP basic auth, a staging password, or Cloudflare "Under Attack" mode,
* a site that is not reachable from the public internet.
Test it yourself: open `https://yoursite.com/wp-json/wp/v2/types` in a browser. You should
see JSON, not a login page or a 403.
Image uploads need a writable `wp-content/uploads` directory. If WordPress can't write there,
the post still publishes — just without its image.
## What gets sent
| Article field | Lands in WordPress as |
| ---------------- | ----------------------------------------------------------- |
| Title | Post title |
| Body | Post content (HTML), with JSON-LD article schema prepended |
| Slug | Post slug |
| Meta description | Post excerpt |
| Featured image | Uploaded to the Media Library and set as the featured image |
Posts are created with status **publish**, author = the connected user, and no category, so they
land in your default category.
Re-publishing the same article creates a **new** post rather than updating the existing one.
Edit in WordPress after the first publish, or use the [webhook connector](/connectors/webhook)
if you need update semantics.
## Common problems
The username or application password is wrong. Check you used the *username*, not the email,
and generate a fresh application password — a copied password with a missing character fails
silently in most password managers.
We tried both `/wp-json/` and `?rest_route=` and neither returned JSON. Usually one of:
* a security plugin blocking the REST API,
* the site sitting behind HTTP basic auth, a staging password, or Cloudflare "Under Attack" mode,
* a site that is not reachable from the public internet.
Test it yourself: open `https://yoursite.com/wp-json/wp/v2/types` in a browser. You should
see JSON, not a login page or a 403.
Image uploads need a writable `wp-content/uploads` directory. If WordPress can't write there,
the post still publishes — just without its image.