

We request
sites:read, cms:read and cms:write — enough to list your sites and collections
and create items. We cannot edit your designs or publish your site.Before you start
- A Webflow site with a CMS collection for your posts (a blog collection created from any Webflow template works).
- A Webflow account with access to that site’s CMS.
- The collection needs a Rich text field for the body. Its
Namefield holds the title.
Step 1 — Authorise
Project Settings → Integrations → Webflow → Connect. Webflow asks which sites or Workspaces to grant access to.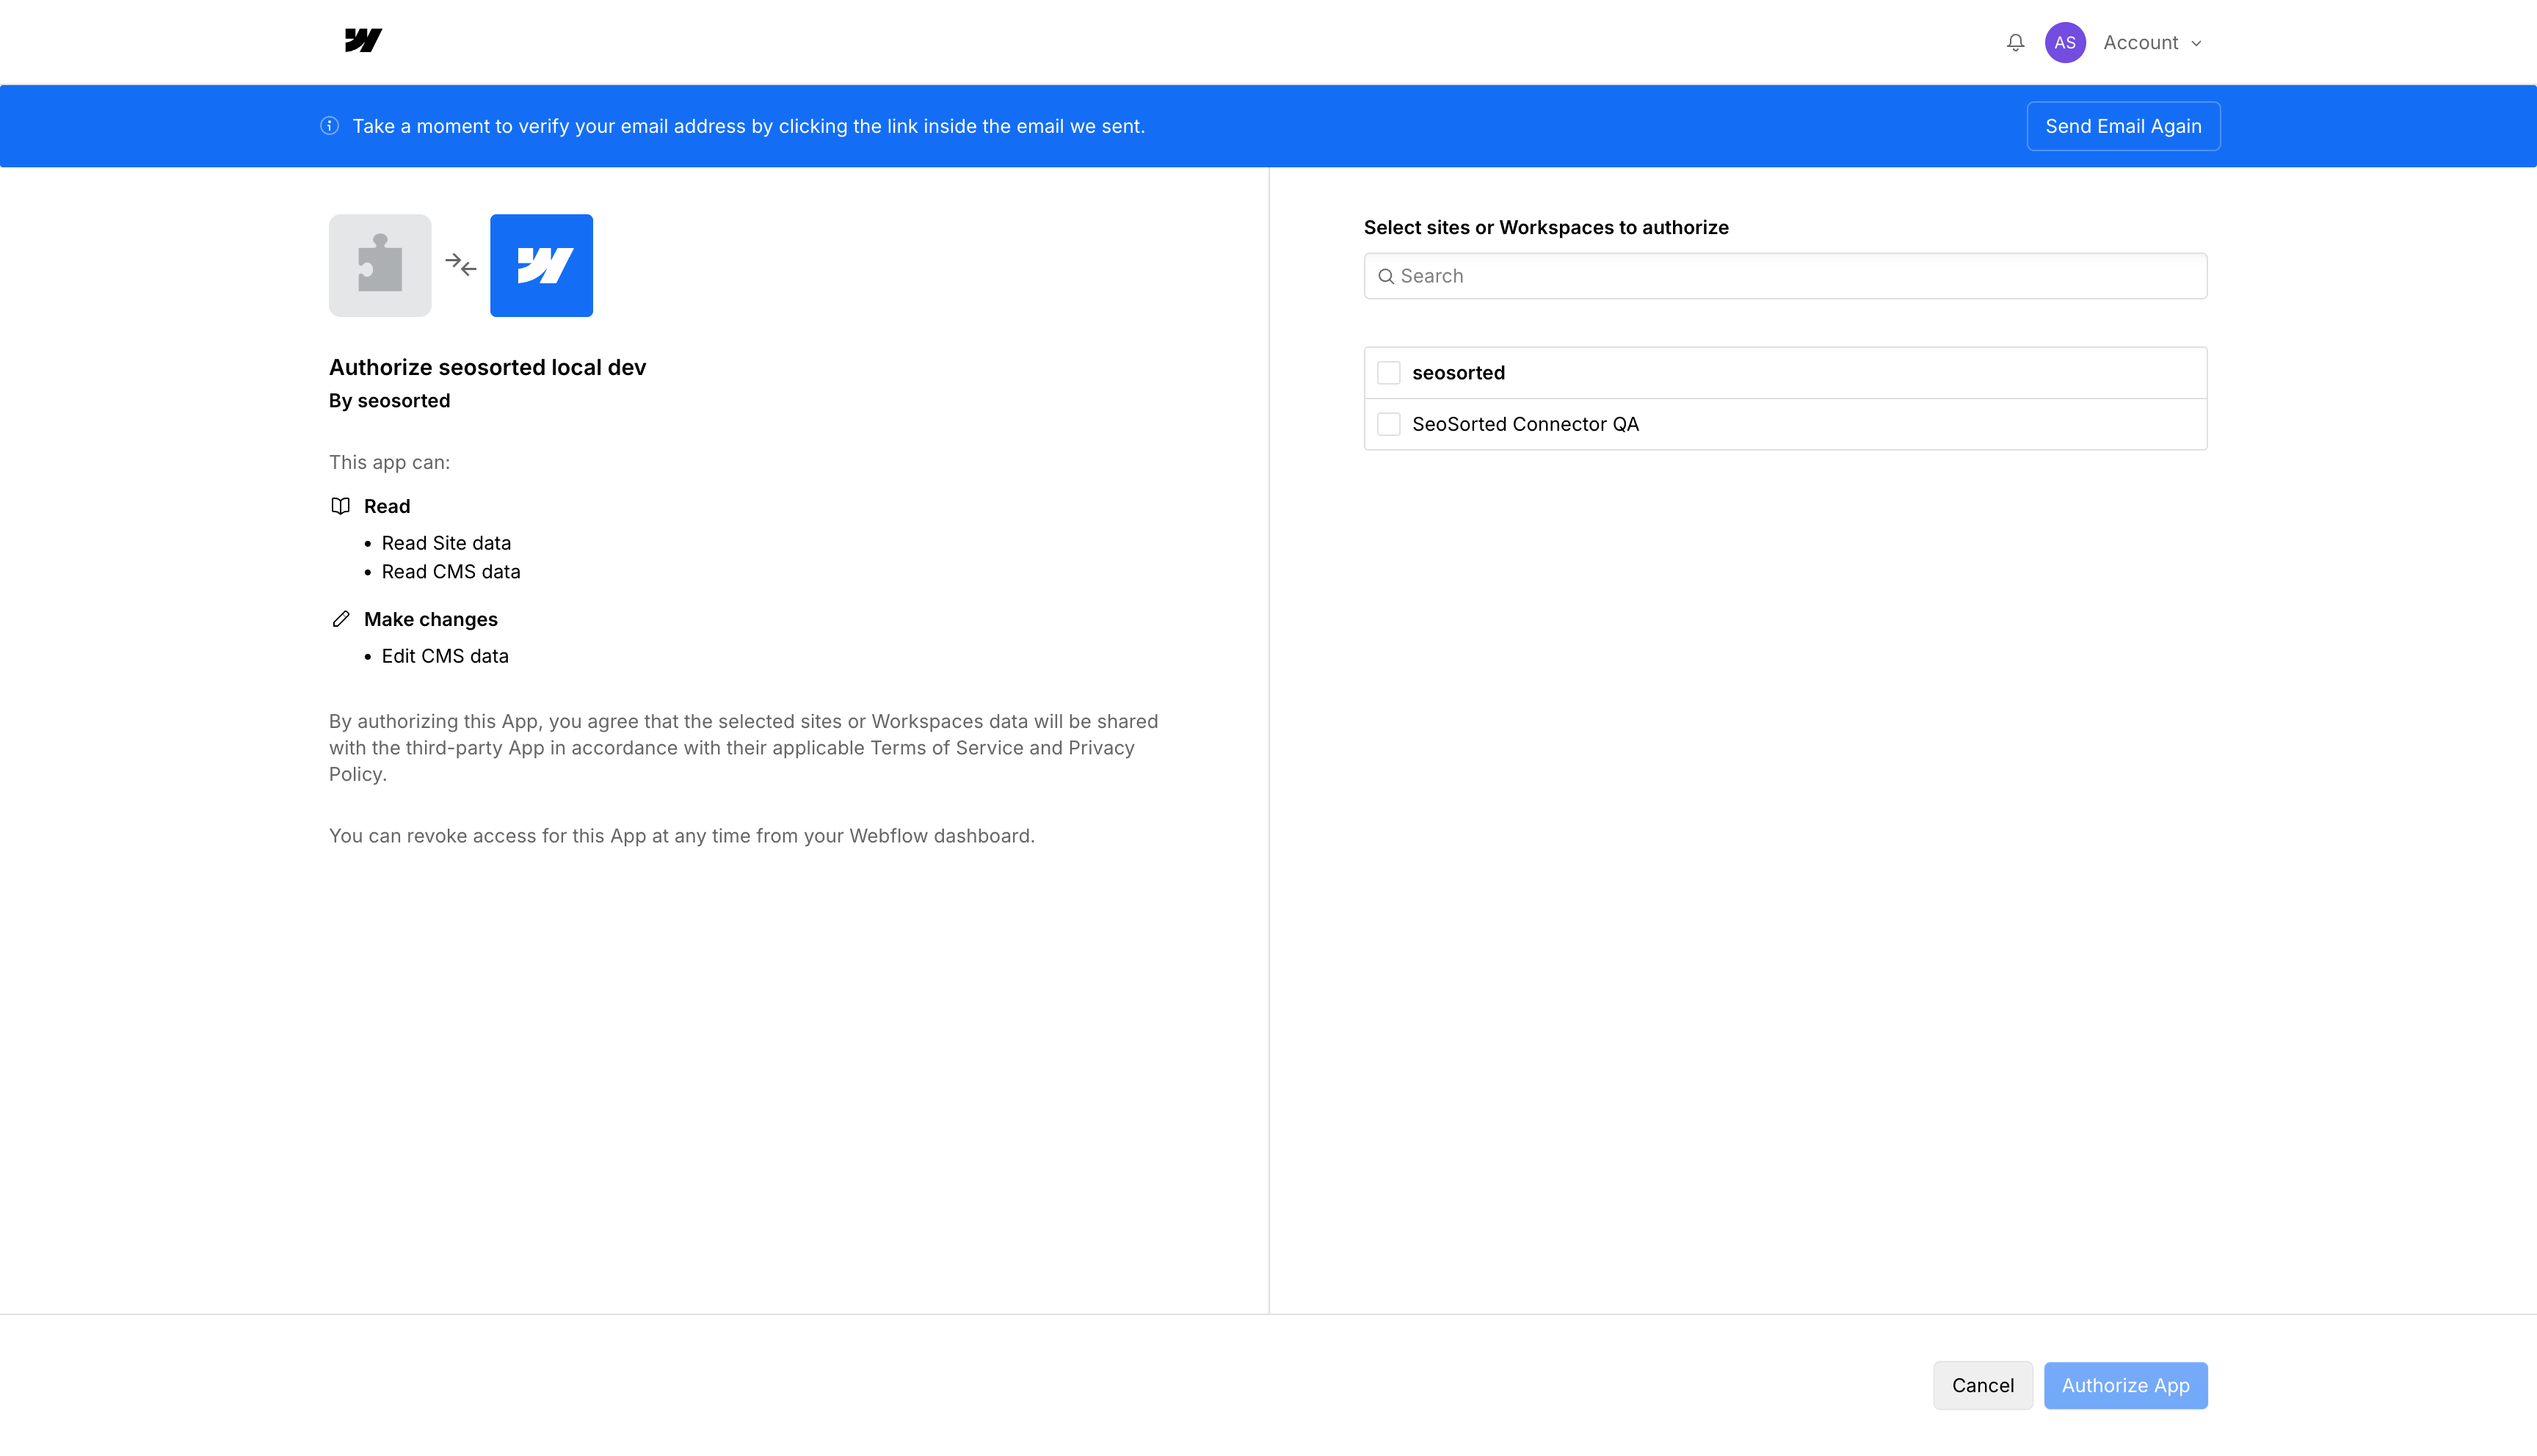
Webflow's authorisation screen — pick the site you publish from
Step 2 — Choose a collection and map fields
The card shows Setup required — pick a collection. Open the card’s ⋮ menu and choose Finish setup — or click Publish on any article and choose Finish setup there. Pick the site and the collection that holds your posts. Every field in that collection is then listed, with the fields your collection requires at the top.- Each dropdown only offers article values that fit that field’s type — the body can only go into a Rich text field, images only into Image fields, the publish date only into a Date field.
- We pre-fill the obvious matches from your field names and types —
Name,Slug,Post Body,Post Summary,Main Image,Thumbnail,Meta Title,Published Dateand so on. - Fields that can’t come from an article — an Option such as Category, a Reference such as Author, a Switch, a Link or a Color — can take a fixed value that every post you publish gets. Options and references are chosen from what already exists in your Webflow CMS.
- Save configuration stays disabled until every field your collection marks as required has a value. Webflow rejects an item with an empty required field, so we stop it here instead of at publish time.
- Added a field in Webflow while the dialog was open? Click Refresh fields.
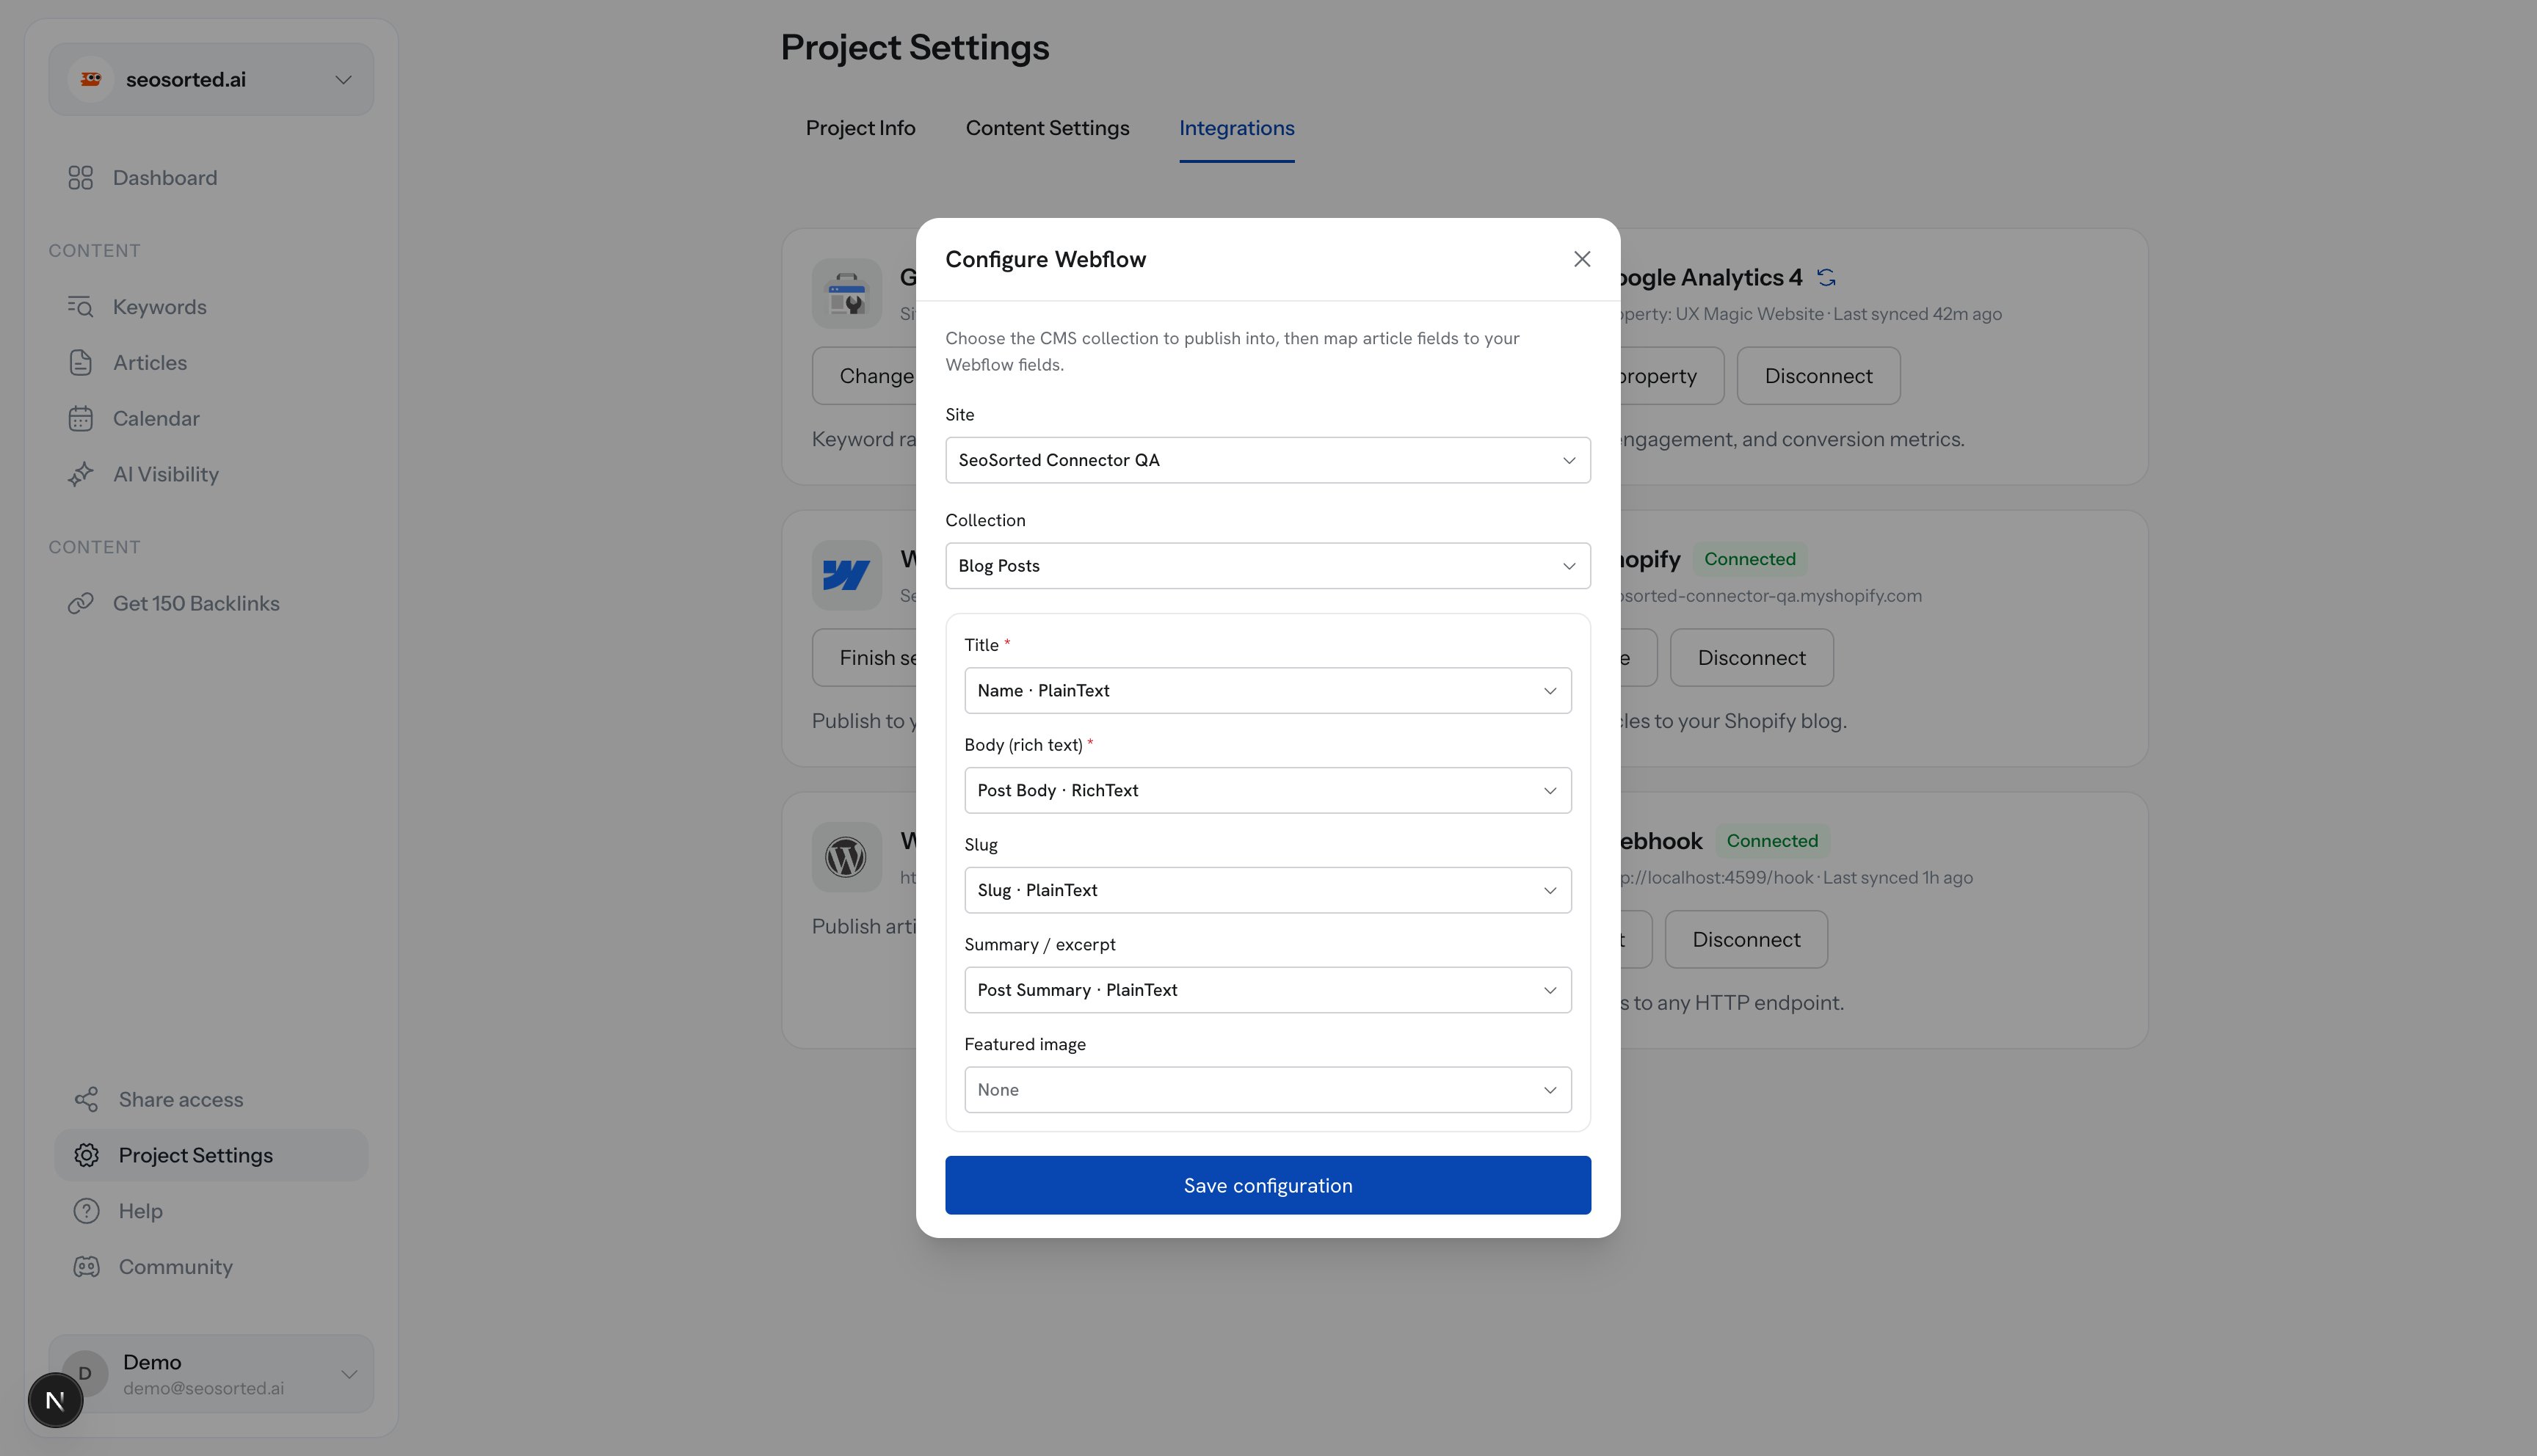
Site, collection and field mapping — we pre-fill the obvious matches
What can go where
Plain text values are stripped of formatting and trimmed to the field’s character limit. Images
are sent with alt text — the article title, unless you map an alt-text field.
Step 3 — Publish
Open an article, click Publish, choose Webflow, then Publish now. We create one collection item with your mapped fields.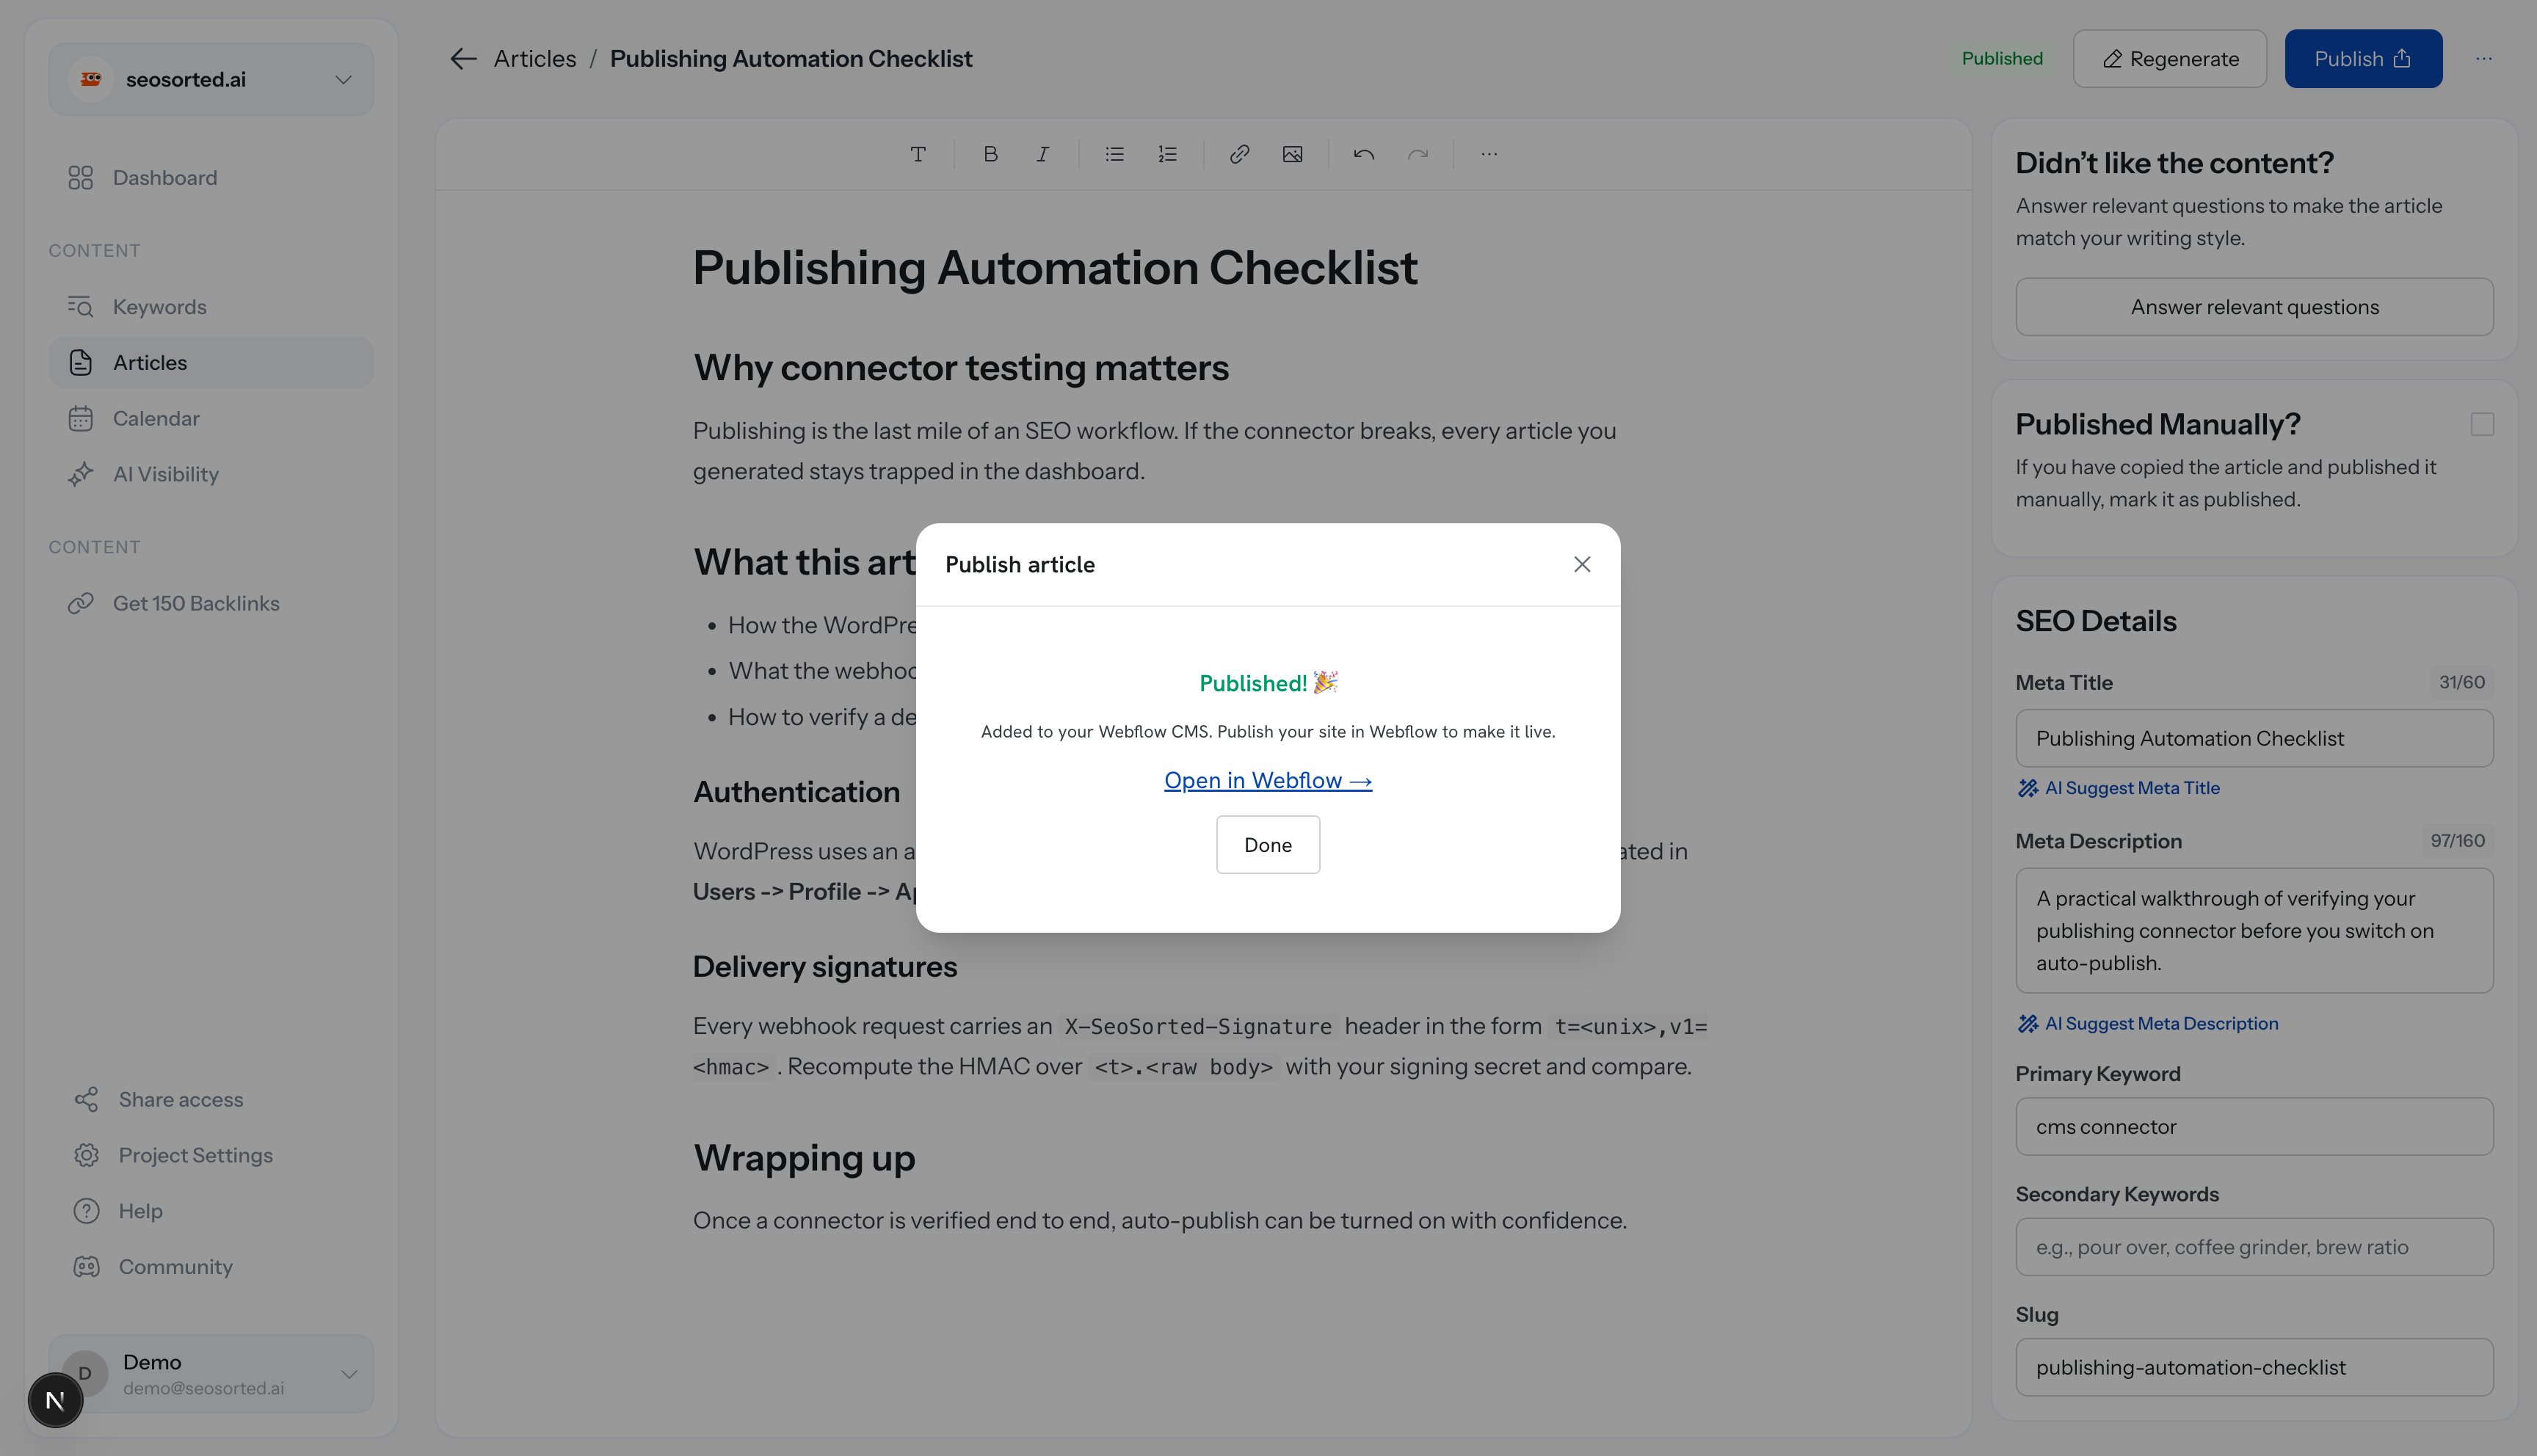
Webflow returns no public URL, so the dialog confirms the publish instead
Items are created live where possible, so they appear on your published site right away if
your templates already render that collection.If the site has never been published, Webflow refuses live items. We fall back to staging the
item instead: it lands in your CMS immediately and goes out with your next site publish. Either
way the publish succeeds.
Common problems
“No Webflow sites found for this account”
“No Webflow sites found for this account”
The authorisation didn’t include any site. Disconnect, connect again, and select a site on
Webflow’s authorisation screen.
“… is required by your Webflow collection”
“… is required by your Webflow collection”
Your collection marks that field as required, and Webflow rejects items that leave it empty.
Fill it from an article field, or choose Set a fixed value… — for a Category option or an
Author reference, pick the value every post should get.
A block of JSON appears at the top of older posts
A block of JSON appears at the top of older posts
Articles published to Webflow before 15 September 2026 carried the article’s structured data
inside the body. Unpublish the article and publish it again to replace the body. Structured
data is now a separate value you can map to a field you render in an Embed element.
Items appear in the CMS but not on the site
Items appear in the CMS but not on the site
Webflow only serves CMS content after a site publish. Publish the site in the Webflow
Designer, and confirm your templates actually render that collection.